

How To Solo A Layer In Photoshop

Photoshop Layers Essential Power Shortcuts
From creating, copying and selecting layers to blend modes, clipping masks and more than, larn how to speed upwards your Photoshop workflow with these essential layers shortcuts!
When it comes to getting the near out of Photoshop with the least corporeality of attempt, at that place are ii things nosotros absolutely need to know—how to use layers, and how to use keyboard shortcuts. Layers keep our piece of work flexible, while keyboard shortcuts help u.s. complete our goals as quickly as possible.
In this tutorial, I've combined the ii and rounded up Photoshop'southward essential keyboard shortcuts for working with layers! Learning these powerful shortcuts will increment your productivity, and they'll boost your conviction equally you take a giant leap forward on the road to Photoshop mastery!
This updated version of the tutorial is for Photoshop CS6 (which is what I'll exist using) and is fully compatible with Photoshop CC. If you're using Photoshop CS5 or earlier, you'll want to check out the original version of this tutorial. Let's get started!
The Essential Layers Shortcuts
Show And Hide The Layers Panel
Past default, Photoshop's Layers panel appears in the panel cavalcade along the right of the screen:
The Layers console opens in the lower right of Photoshop's interface.
You lot tin can prove or hibernate the Layers panel by pressing the F7 cardinal on your keyboard. Press F7 once to hide the Layers panel. Printing F7 again to bear witness information technology. Note that this will also testify and hide the Channels and Paths panels since they're nested in with the Layers panel in the same panel group:
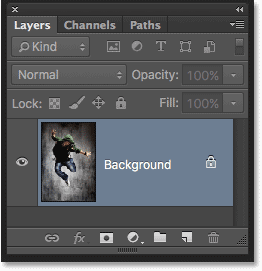
A closer view of the Layers panel.
Naming A New Layer
The normal way to create a new layer in Photoshop is to click the New Layer icon at the bottom of the Layers panel:
Clicking the New Layer icon.
Problem is, Photoshop gives the new layer a generic proper noun, similar "Layer 1", which doesn't tell us anything virtually what the layer will be used for:
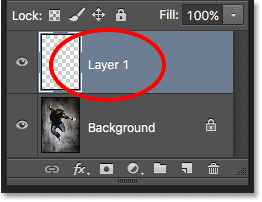
Photoshop's generic layer names are not very helpful.
A meliorate way to create a new layer is to press and concur the Alt (Win) / Pick (Mac) central on your keyboard as you click the New Layer icon:
Belongings Alt (Win) / Option (Mac) while clicking the New Layer icon.
This tells Photoshop to outset popular open the New Layer dialog box where nosotros tin can proper noun the layer before it'due south added. For case, if I was going to employ the Clone Postage Tool on this layer, I could name the layer "Cloning":
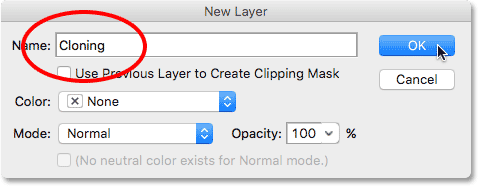
Giving the layer a more descriptive proper name.
Click OK to accept the proper noun and close out of the New Layer dialog box. Here, we encounter my new "Cloning" layer in the Layers panel:
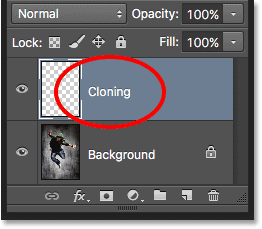
The new layer appears with the custom proper noun.
Creating A New Layer From The Keyboard
We tin can also create new layers directly from the keyboard without needing to click the New Layer icon at all. To create a new layer from your keyboard, press Shift+Ctrl+N (Win) / Shift+Command+N (Mac). Photoshop will pop open the New Layer dialog box so you tin give the layer a descriptive name.
If you don't care nigh the layer'southward name, press Shift+Ctrl+Alt+Northward (Win) / Shift+Command+Option+Northward (Mac) on your keyboard. This will bypass the New Layer dialog box and merely add the new layer with one of Photoshop'southward generic names (like "Layer 2").
Copy A Layer, Or Copy A Selection To A New Layer
To chop-chop make a copy of a layer, or to re-create a selection to a new layer, press Ctrl+J (Win) / Command+J (Mac). Here, I've fabricated a copy of my Groundwork layer. Notice that Photoshop automatically named the copy "Layer i". If you want to proper noun the layer yourself before information technology'southward added, press Ctrl+Alt+J (Win) / Control+Option+J (Mac) which will open the New Layer dialog box:
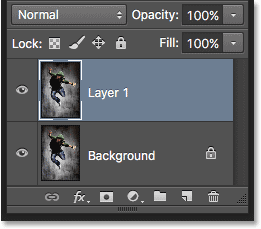
Making a copy of the Groundwork layer by pressing Ctrl+J (Win) / Command+J (Mac).
Copying A Layer While Moving It
To copy and motility a layer at the aforementioned time, get-go select the layer you demand in the Layers console. And so printing the letter V on your keyboard to select the Move Tool. Press and agree your Alt (Win) / Option (Mac) primal as you click and drag on the layer in the certificate to motion it. Rather than moving the original layer, yous'll motility a copy of the layer while the original stays in place.
Calculation A New Layer Below The Currently Selected Layer
By default, Photoshop adds new layers in a higher place the layer that's currently selected in the Layers console, but we can also add together new layers beneath the currently selected layer. Notice in this screenshot that my top layer (Layer 1) is selected. To tell Photoshop to add a new layer below information technology, all I need to do is press and hold the Ctrl (Win) / Control (Mac) primal on my keyboard every bit I click the New Layer icon. If I wanted to proper noun the new layer at the aforementioned time (which I'm not going to do), I'd press and hold Ctrl+Alt (Win / Command+Selection (Mac) instead:
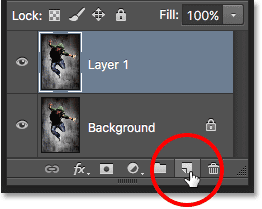
Belongings Ctrl (Win) / Command (Mac) while clicking the New Layer icon.
Photoshop adds the new layer, and considering I was belongings my Ctrl (Win) / Command (Mac) central, it places the new layer below Layer ane rather than higher up information technology. Note that this play a joke on does not work when the Background layer is selected, since Photoshop does non allow us to identify layers below the Background layer:

The new layer appears below the layer that was previously selected.
Select All Layers At In one case
To select all layers at one time, press Ctrl+Alt+A (Win) / Control+Pick+A (Mac). Note that this selects all layers except the Groundwork layer:
Pressing Ctrl+Alt+A (Win) / Command+Option+A (Mac) to select all layers (except the Background layer).
Selecting Multiple Layers
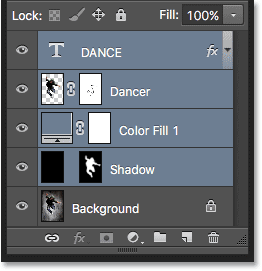
To select multiple layers that are contiguous (that is, directly to a higher place or beneath each other), click on the summit layer to select it, then press and concur your Shift key and click on the bottom layer (or vice versa). This will select the superlative layer, the bottom layer, and all layers in between. Here, I've clicked on the "Dancer" layer, then Shift-clicked on the "Shadow" layer. Photoshop selected both layers plus the "Colour Fill i" layer betwixt them:
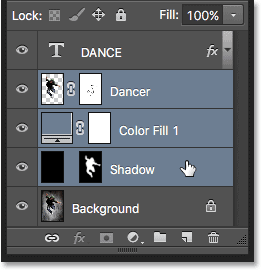
Selecting contiguous layers.
Some other style to select multiple layers that are all directly above or below each other is to printing and concur Shift+Alt (Win) / Shift+Option (Mac) and utilize the left and right subclass keys ( [ and ] ) on your keyboard. The right subclass central will add together the layer above the currently selected layer to your option. Continue pressing it to move upwards the layer stack and select more than layers. The left bracket key will add the layer below the currently selected layer. Printing it repeatedly to motility downwards the layer stack adding more than layers.
To select multiple layers that are non-contiguous (not straight above or below each other), press and agree your Ctrl (Win) / Control (Mac) key and click on each layer you want to select:
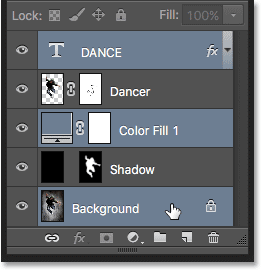
Selecting non-face-to-face layers.
Coil Through The Layers
To scroll through the layers in the Layers console, press and hold Alt (Win) / Option (Mac) and use your left and right bracket keys ( [ and ] ). The correct bracket key scrolls upwards through the layers; the left subclass key scrolls down.
Move Layers Up And Downward The Layer Stack
To move the selected layer up or down the layer stack, press and hold Ctrl (Win) / Control (Mac) and use your left and right bracket keys ( [ and ] ). The right bracket fundamental moves the layer up; the left bracket key moves it downwardly. Notation that this does not work with the Background layer since you lot can't move the Background layer. Also, you lot won't be able to movement any other layers below the Background layer.
Jump A Layer Directly To The Summit Or Bottom Of The Layer Stack
To instantly jump the selected layer straight to the top of the layer stack, press Shift+Ctrl+] (Win) / Shift+Command+] (Mac). Hither, I've jumped my "Color Fill 1" layer to the top:
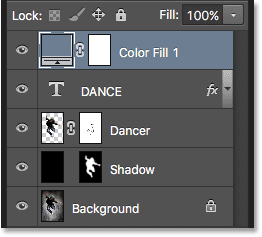
Jumping the selected layer to the summit of the stack.
To jump the selected layer to the bottom of the layer stack, or at least to the spot just above the Groundwork layer (since nosotros can't identify layers beneath the Groundwork layer), press Shift+Ctrl+[ (Win) / Shift+Command+[ (Mac). Again, neither i of these shortcuts works with the Background layer:
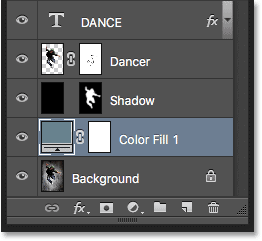
Jumping the selected layer to the bottom of the stack (above the Groundwork layer).
Testify And Hide Layers
If you've been using Photoshop for a while, you lot probably know that you can temporarily hide a layer in the document by clicking its visibility icon (the eyeball) in the Layers panel:
Click the visibility (eyeball) icon to toggle a layer on or off.
What you may non know is that you can temporarily hibernate every layer except for that one layer by pressing and holding your Alt (Win) / Choice (Mac) key every bit you lot click the visibility icon. Notice that the eyeball is now visible merely for my "Dancer" layer, which tells us that every other layer in the certificate is now hidden. Only that i layer remains visible. To turn all the layers back on, once again printing and hold Alt (Win) / Pick (Mac) and click the same visibility icon.
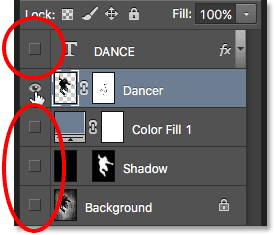
Alt-clicking (Win) / Choice-clicking (Mac) toggles all other layers on and off.
Viewing Layers I At A Time
One very helpful trick many people don't know almost is that after you've Alt-clicked (Win) / Option-clicked (Mac) on a layer's visibility icon to hide all layers except for that one layer, you tin can then scroll through your layers, showing them one at a time, by keeping your Alt (Win) / Option (Mac) cardinal held downward and pressing the left and right bracket keys ( [ and ] ).
The correct subclass key will gyre up through the layers; the left bracket key will scroll downwards. Every bit you arrive at each new layer, Photoshop will make that layer visible in the document and go out all the others hidden. This makes it like shooting fish in a barrel to whorl through your layers and see exactly what's on each one.
Select The Contents Of A Layers
To select the contents of a layer, press and hold your Ctrl (Win) / Command (Mac) fundamental and click directly on the layer's preview thumbnail in the Layers panel. A selection outline will announced around the layer's contents in the certificate:
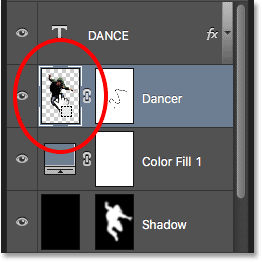
Property Ctrl (Win) / Command (Mac) and clicking on the layer's preview thumbnail.
Select The Entire Layer
To select the entire layer itself, not simply its contents, first click on the layer to make it active, so press Ctrl+A (Win) / Control+A (Mac) on your keyboard.
Create A New Group From Layers
To quickly create a layer group from your selected layers, first select the layers y'all want to include (we covered selecting multiple layers earlier):
Selecting the layers to place inside the group.
Then, with the layers selected, printing Ctrl+Yard (Win) / Control+G (Mac) on your keyboard. Photoshop volition create a new layer group and place your selected layers within it. To ungroup the layers, press Shift+Ctrl+Thousand (Win) / Shift+Control+G (Mac):
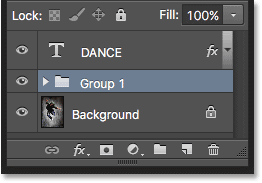
Printing Ctrl+G (Win) / Command+M (Mac) to group layers.
Merging Layers
To merge a layer with the layer directly beneath it in the Layers panel, press Ctrl+E (Win) / Control+E (Mac).
To merge multiple layers together, get-go select the layers you lot desire to merge, then printing Ctrl+E (Win) / Command+Due east (Mac).
To merge two or more layers onto a new layer while still keeping the original layers, starting time select the layers you lot want to merge, and then press Ctrl+Alt+E (Win) / Command+Option+E (Mac).
To merge all layers and flatten the image onto a single layer, press Shift+Ctrl+Due east (Win) / Shift+Command+Due east (Mac).
To merge all layers onto a new, separate layer and keep the originals, press Shift+Ctrl+Alt+E (Win) / Shift+Control+Option+E (Mac).
Create A Clipping Mask
There's a couple of quick ways to create clipping masks in Photoshop using keyboard shortcuts. The first way is to hover your mouse cursor directly over the dividing line between two layers in the Layers console. Then, press and hold your Alt (Win) / Option (Mac) key and click. The top layer will exist clipped to the layer below it. Do the aforementioned thing again to release the clipping mask:
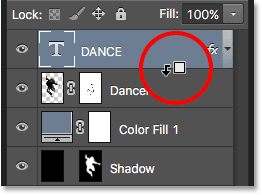
With Alt (Win) / Option (Mac) held down, your mouse cursor will change into a clipping mask icon.
Another way to create a clipping mask is to kickoff select the layer that should be clipped to the layer below information technology. Then press Ctrl+Alt+G (Win) / Control+Option+G (Mac) on your keyboard. Pressing the aforementioned shortcut again volition release the mask.
Cycle Through Layer Blend Modes
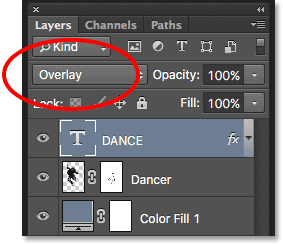
When trying to decide which layer blend mode to use, near people choose one from the Blend Style drop-down list in the acme left corner of the Layers console to come across what outcome it has on their paradigm. So, they cull a different one from the listing to view the effect. And so so they choose some other, and another, and then on. There's a much amend way.
To easily wheel through Photoshop's layer alloy modes and preview the results, press and hold your Shift primal and utilise the plus ( + ) and minus ( - ) keys on your keyboard. The plus central scrolls down through the listing; the minus key scrolls upwardly.
Note, though, that some of Photoshop'due south tools, like the various castor tools, shape tools and the Gradient Tool, accept their own blend modes to choose from. Using this keyboard shortcut with one of these tools selected volition cycle you through the tool's alloy modes, not the layer blend modes::
Concur Shift and utilize the plus and minus keys to cycle through the blend modes.
Yous can too jump to specific blend modes from the keyboard. For a complete list of blend mode shortcuts, check out our Layer Blend Modes Essential Keyboard Shortcuts tutorial.
Changing The Layer Opacity
To chop-chop modify the opacity of a layer, outset press the letter 5 on your keyboard to select Photoshop'due south Move Tool, so blazon a number. Type "v" for 50% opacity, "8" for 80%, "iii" for 30%, so on. If you need a more specific opacity value, like 25%, type "25" apace. For 100% opacity, type "0". Whatever opacity value yous enter appears in the Opacity option in the summit correct corner of the Layers panel (across from the Blend Mode option):
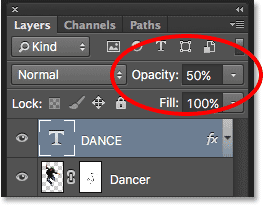
Select a layer in the Layers panel, then type a number to change the its Opacity value.
You don't technically need to have the Move Tool selected for this shortcut to work, but y'all do need to have a tool selected that does not have its own independent Opacity pick (otherwise you'll modify the tool'south opacity, not the layer opacity). The Move Tool does not take its own Opacity option, and since it's located at the top of the Tools panel, it's the easiest to select.
Changing The Fill Value
We tin also change a layer's Fill value from the keyboard in much the same way. The Make full choice is located directly under the Opacity pick, and like Opacity, Make full controls the transparency of a layer. The difference between them is that Opacity controls the transparency level for both the contents of the layer and whatsoever layer styles applied to it, while Fill ignores any layer styles and affects only the layer'south actual contents. Meet our Layer Opacity vs Make full tutorial for more than details.
To modify the Fill value from the keyboard, press and hold Shift, then type in the new value:
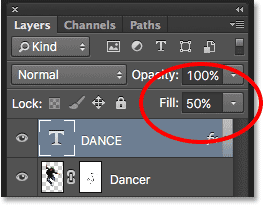
Agree Shift and type a number to change the Fill value.
Deleting A Layer
Finally, to delete a layer, rather than dragging information technology down onto the Trash Bin at the bottom of the Layers panel, just printing Backspace (Win) / Delete (Mac) on your keyboard.
Other Stuff
© 2022 Photoshop Essentials.com.
For inspiration, not duplication.
Site design by Steve Patterson.
Photoshop is a trademark of Adobe Systems Inc.
Source: https://www.photoshopessentials.com/basics/layer-shortcuts/
Posted by: jacksonpaphatterst.blogspot.com
0 Response to "How To Solo A Layer In Photoshop"
Post a Comment