

How To Do Comet Mode In Photoshop
One of the near difficult objects to procedure are Comets. If you stack confronting the stars yous get a trail of comet heads and if you stack against the comet you get star trails. If y'all want a comet image without star trails it requires a composite epitome.
We will go through the process twice. We will do one set through Pixinsight with Photoshop and Maxim DL with Photoshop.
You should have 2 information sets when doing comets. One data set guided on the stars and one data gear up guided on the comet head. The comet data should take elongated stars and the star data will have pinpoint stars with a comet shifting in each sub.
MAXIM DL AND PHOTOSHOP PROCESSING:
We will start out with the MAXIM DL version. Now this may work in other stacking programs provided they allow you to do one star alignment. In Proverb open up the stack feature or the + icon and add all your subs. If you lot are using a MONO camera brand certain to fix group to individual planes and check each filter to make sure the identifiers are associated correctly. Also make certain to add your calibration data so its incorporated in the stack.
Subsequently you lot set that upwardly yous want to go to align and select the Transmission one star - Shift But option. Now you need to go through and and click on the comet caput from each image in each group.
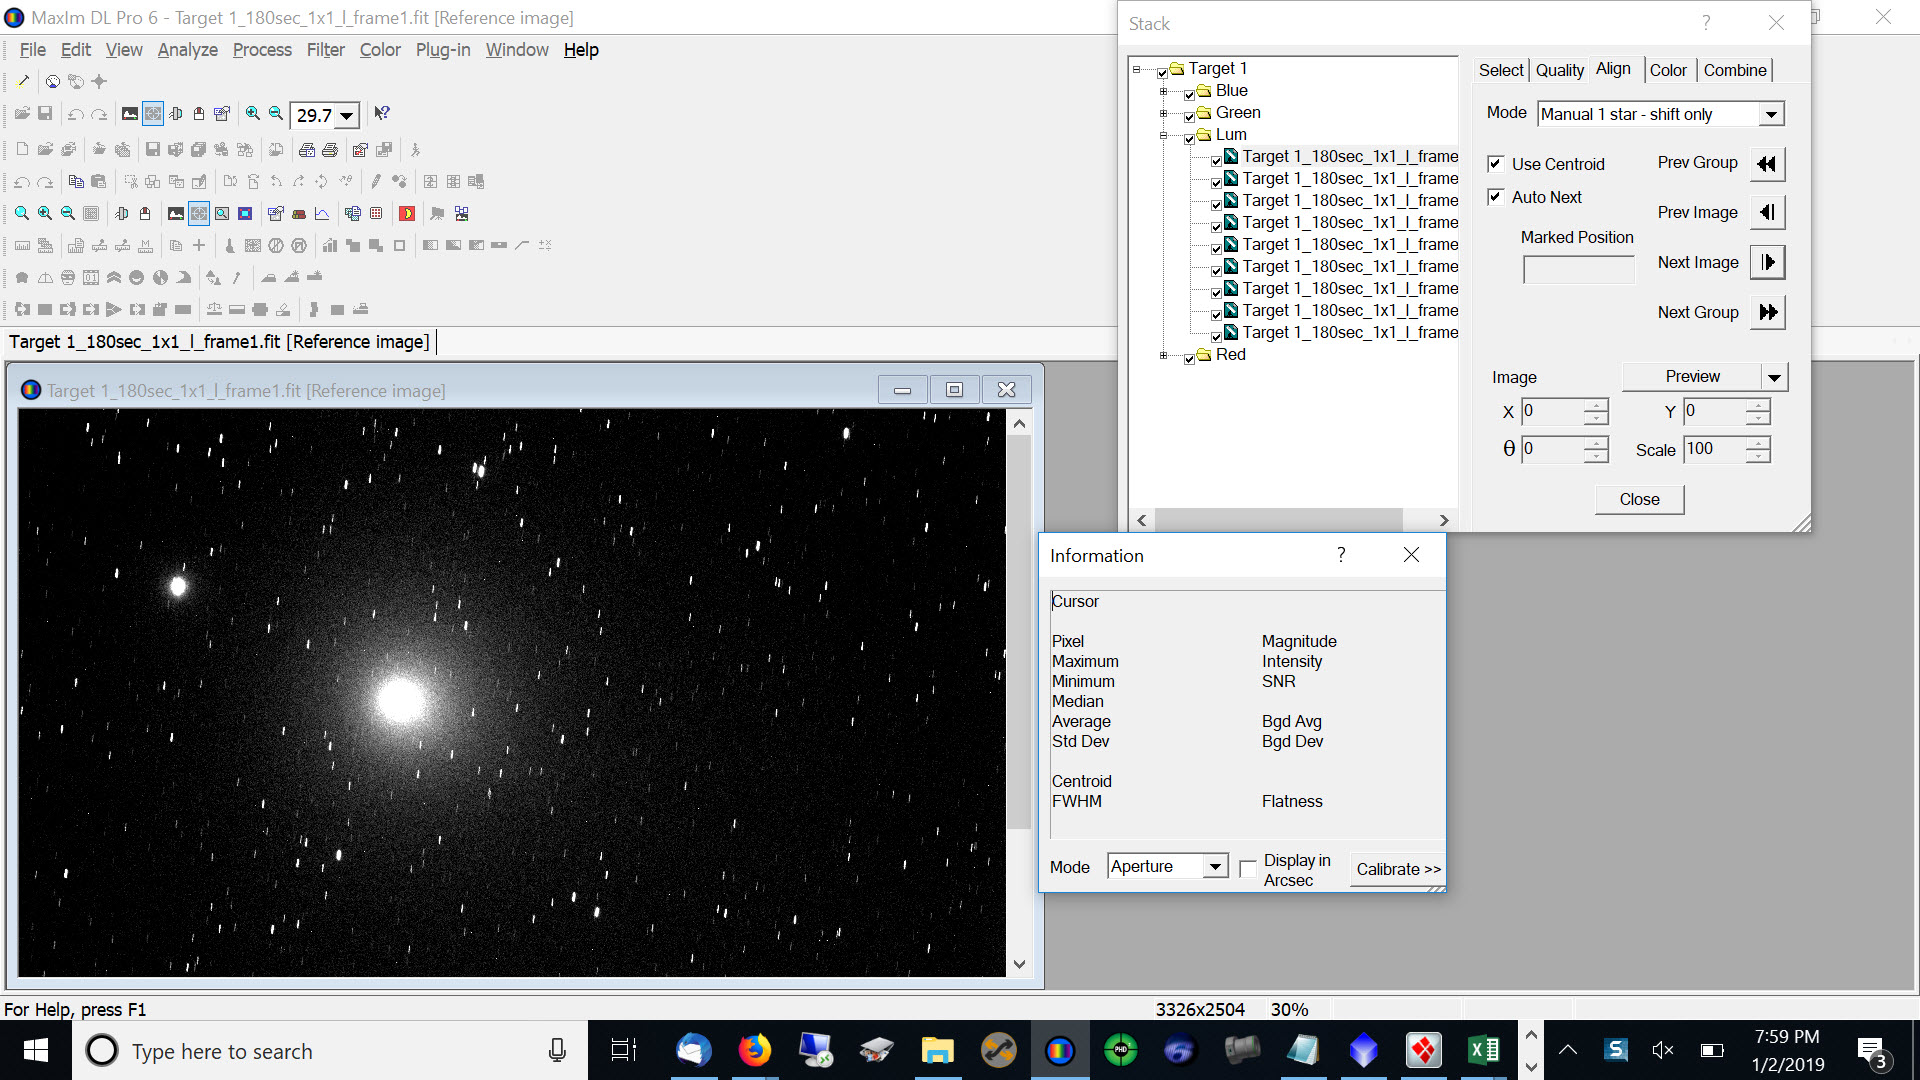
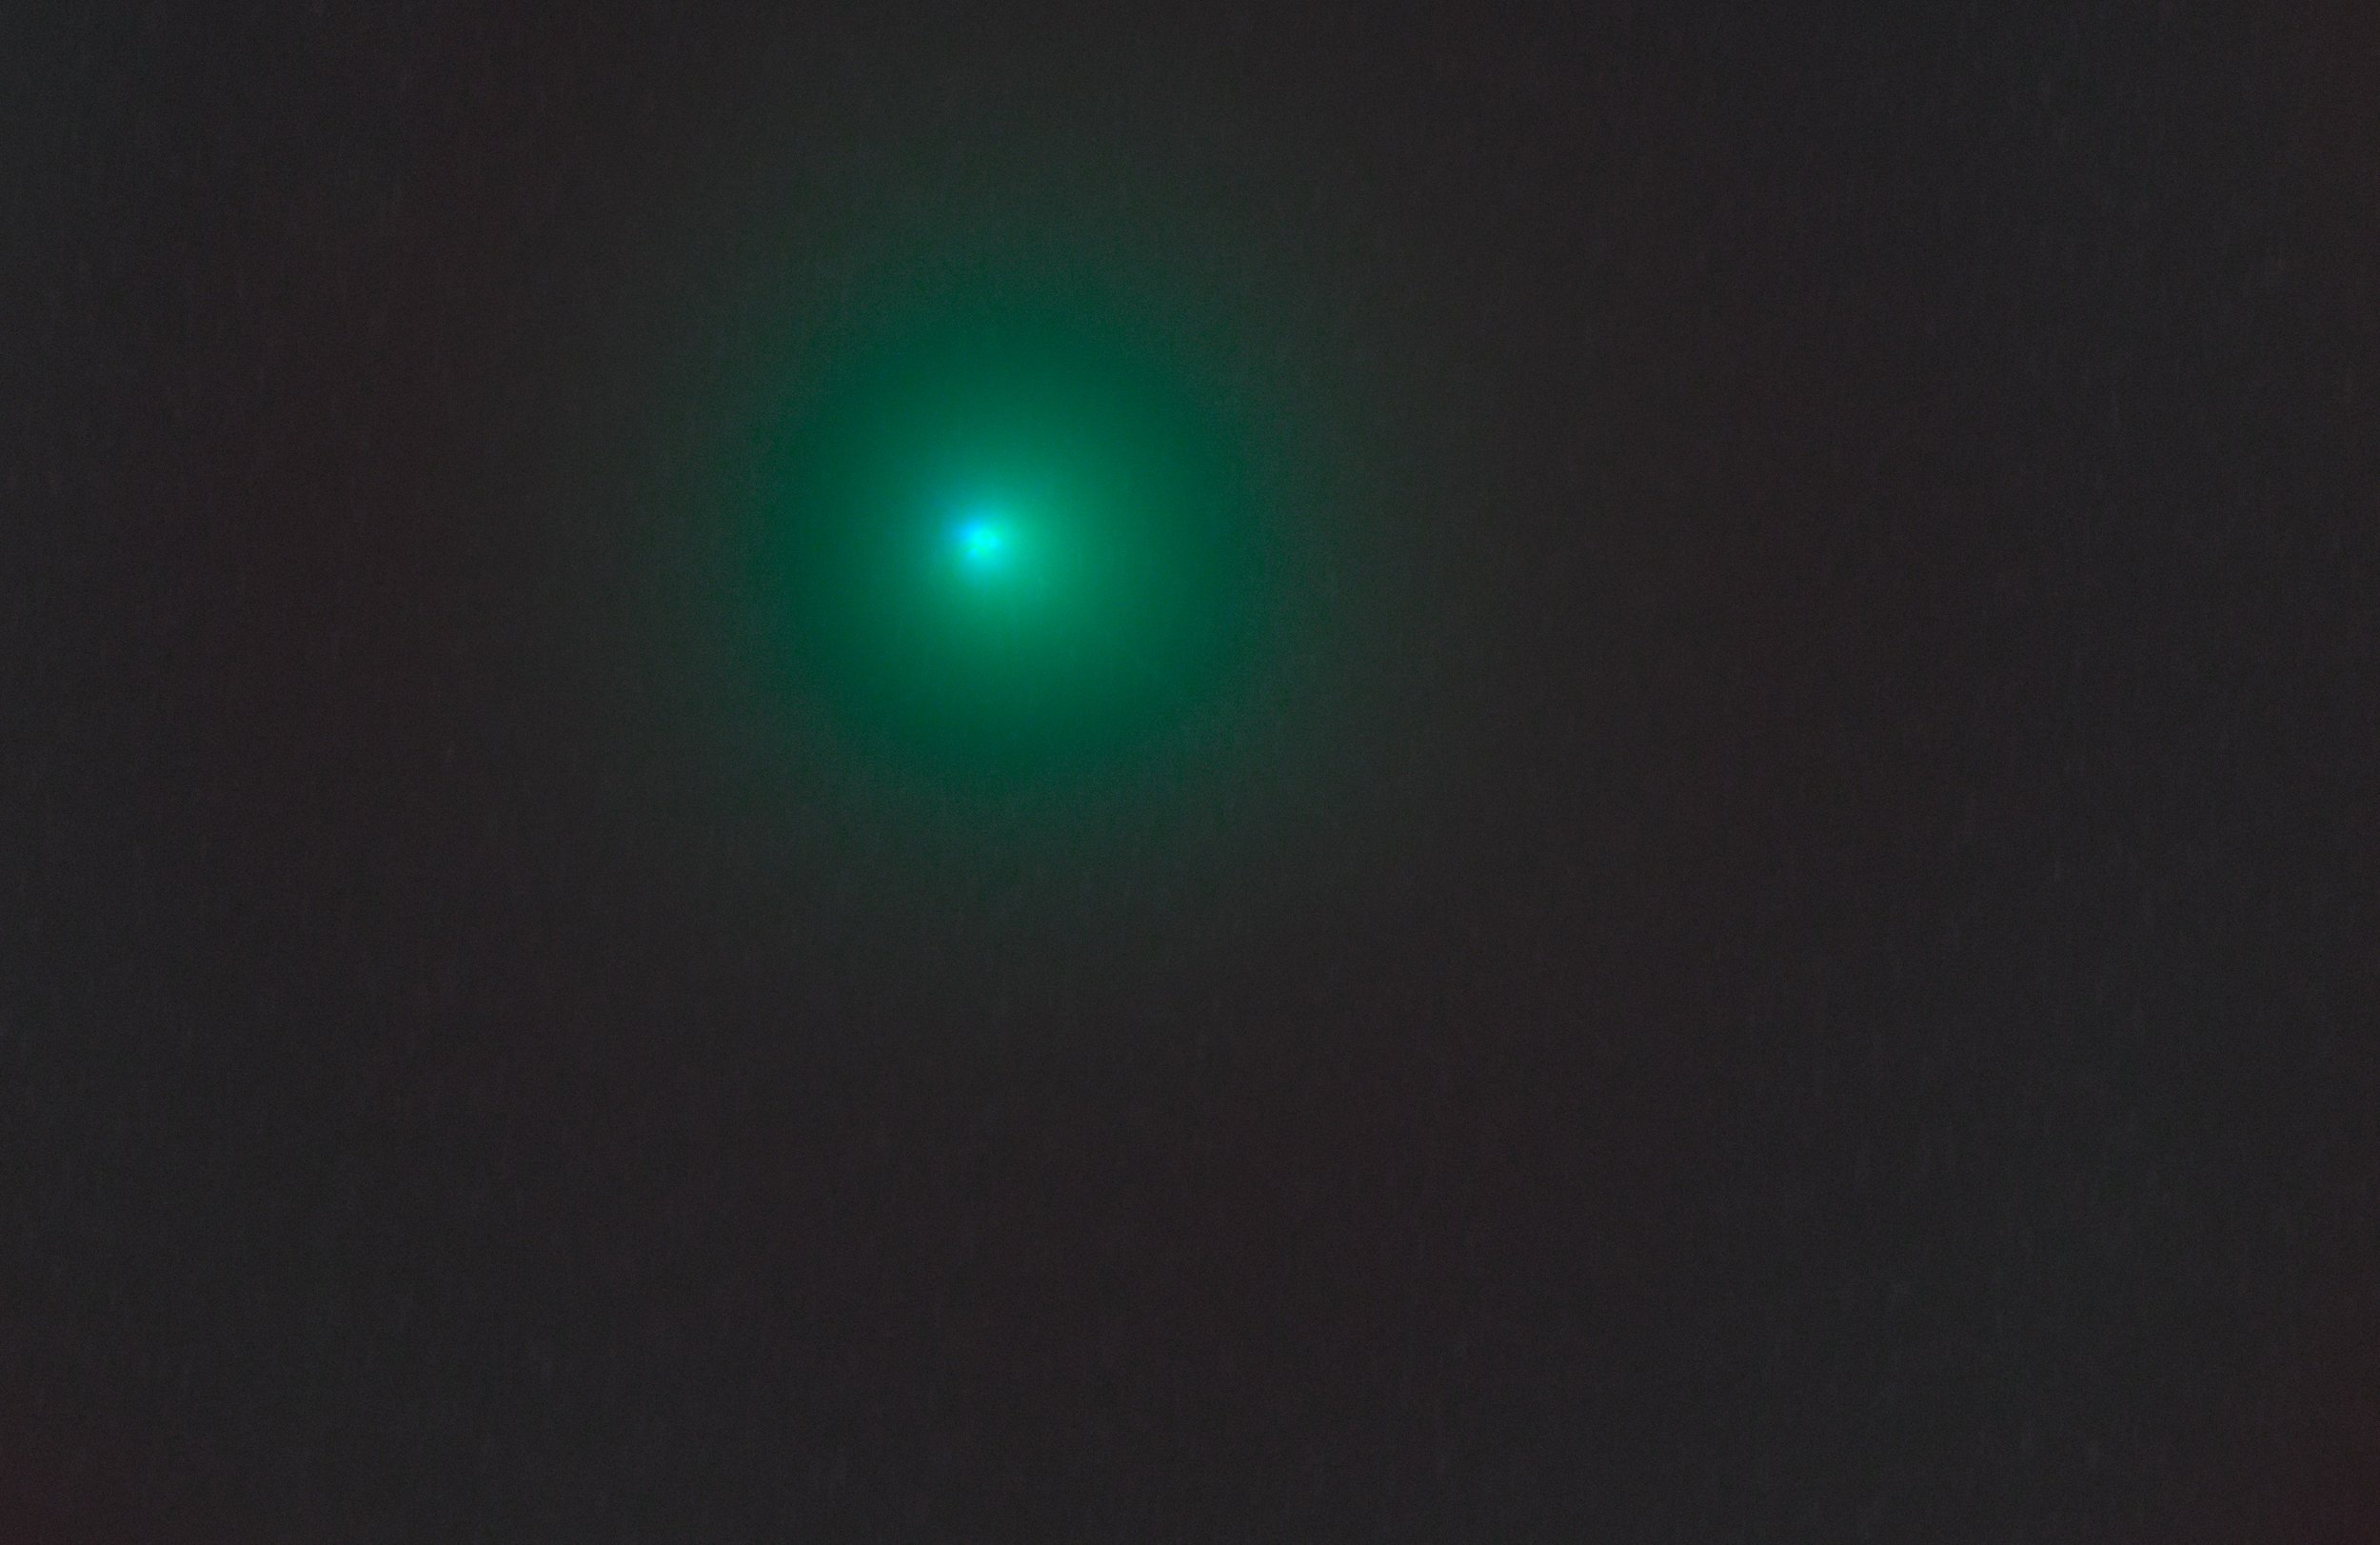
After you select the head in each group and image y'all become to combine and select the median combine method. One time combined this should give yous an LRGB image of the comet with nearly all the stars removed. The paradigm below is what you should go after processing. You tin can see the stars are eliminated and all that remains is the comet head. Unfortunately 46/P Wirtanen didnt have nice tail but if it had yous would be able to see that in this image.
I recommend for Mono images processing each aqueduct separately and so combining the LRGB in Photoshop as you volition get a cleaner comet image than in Maxim since you have more than processing options.
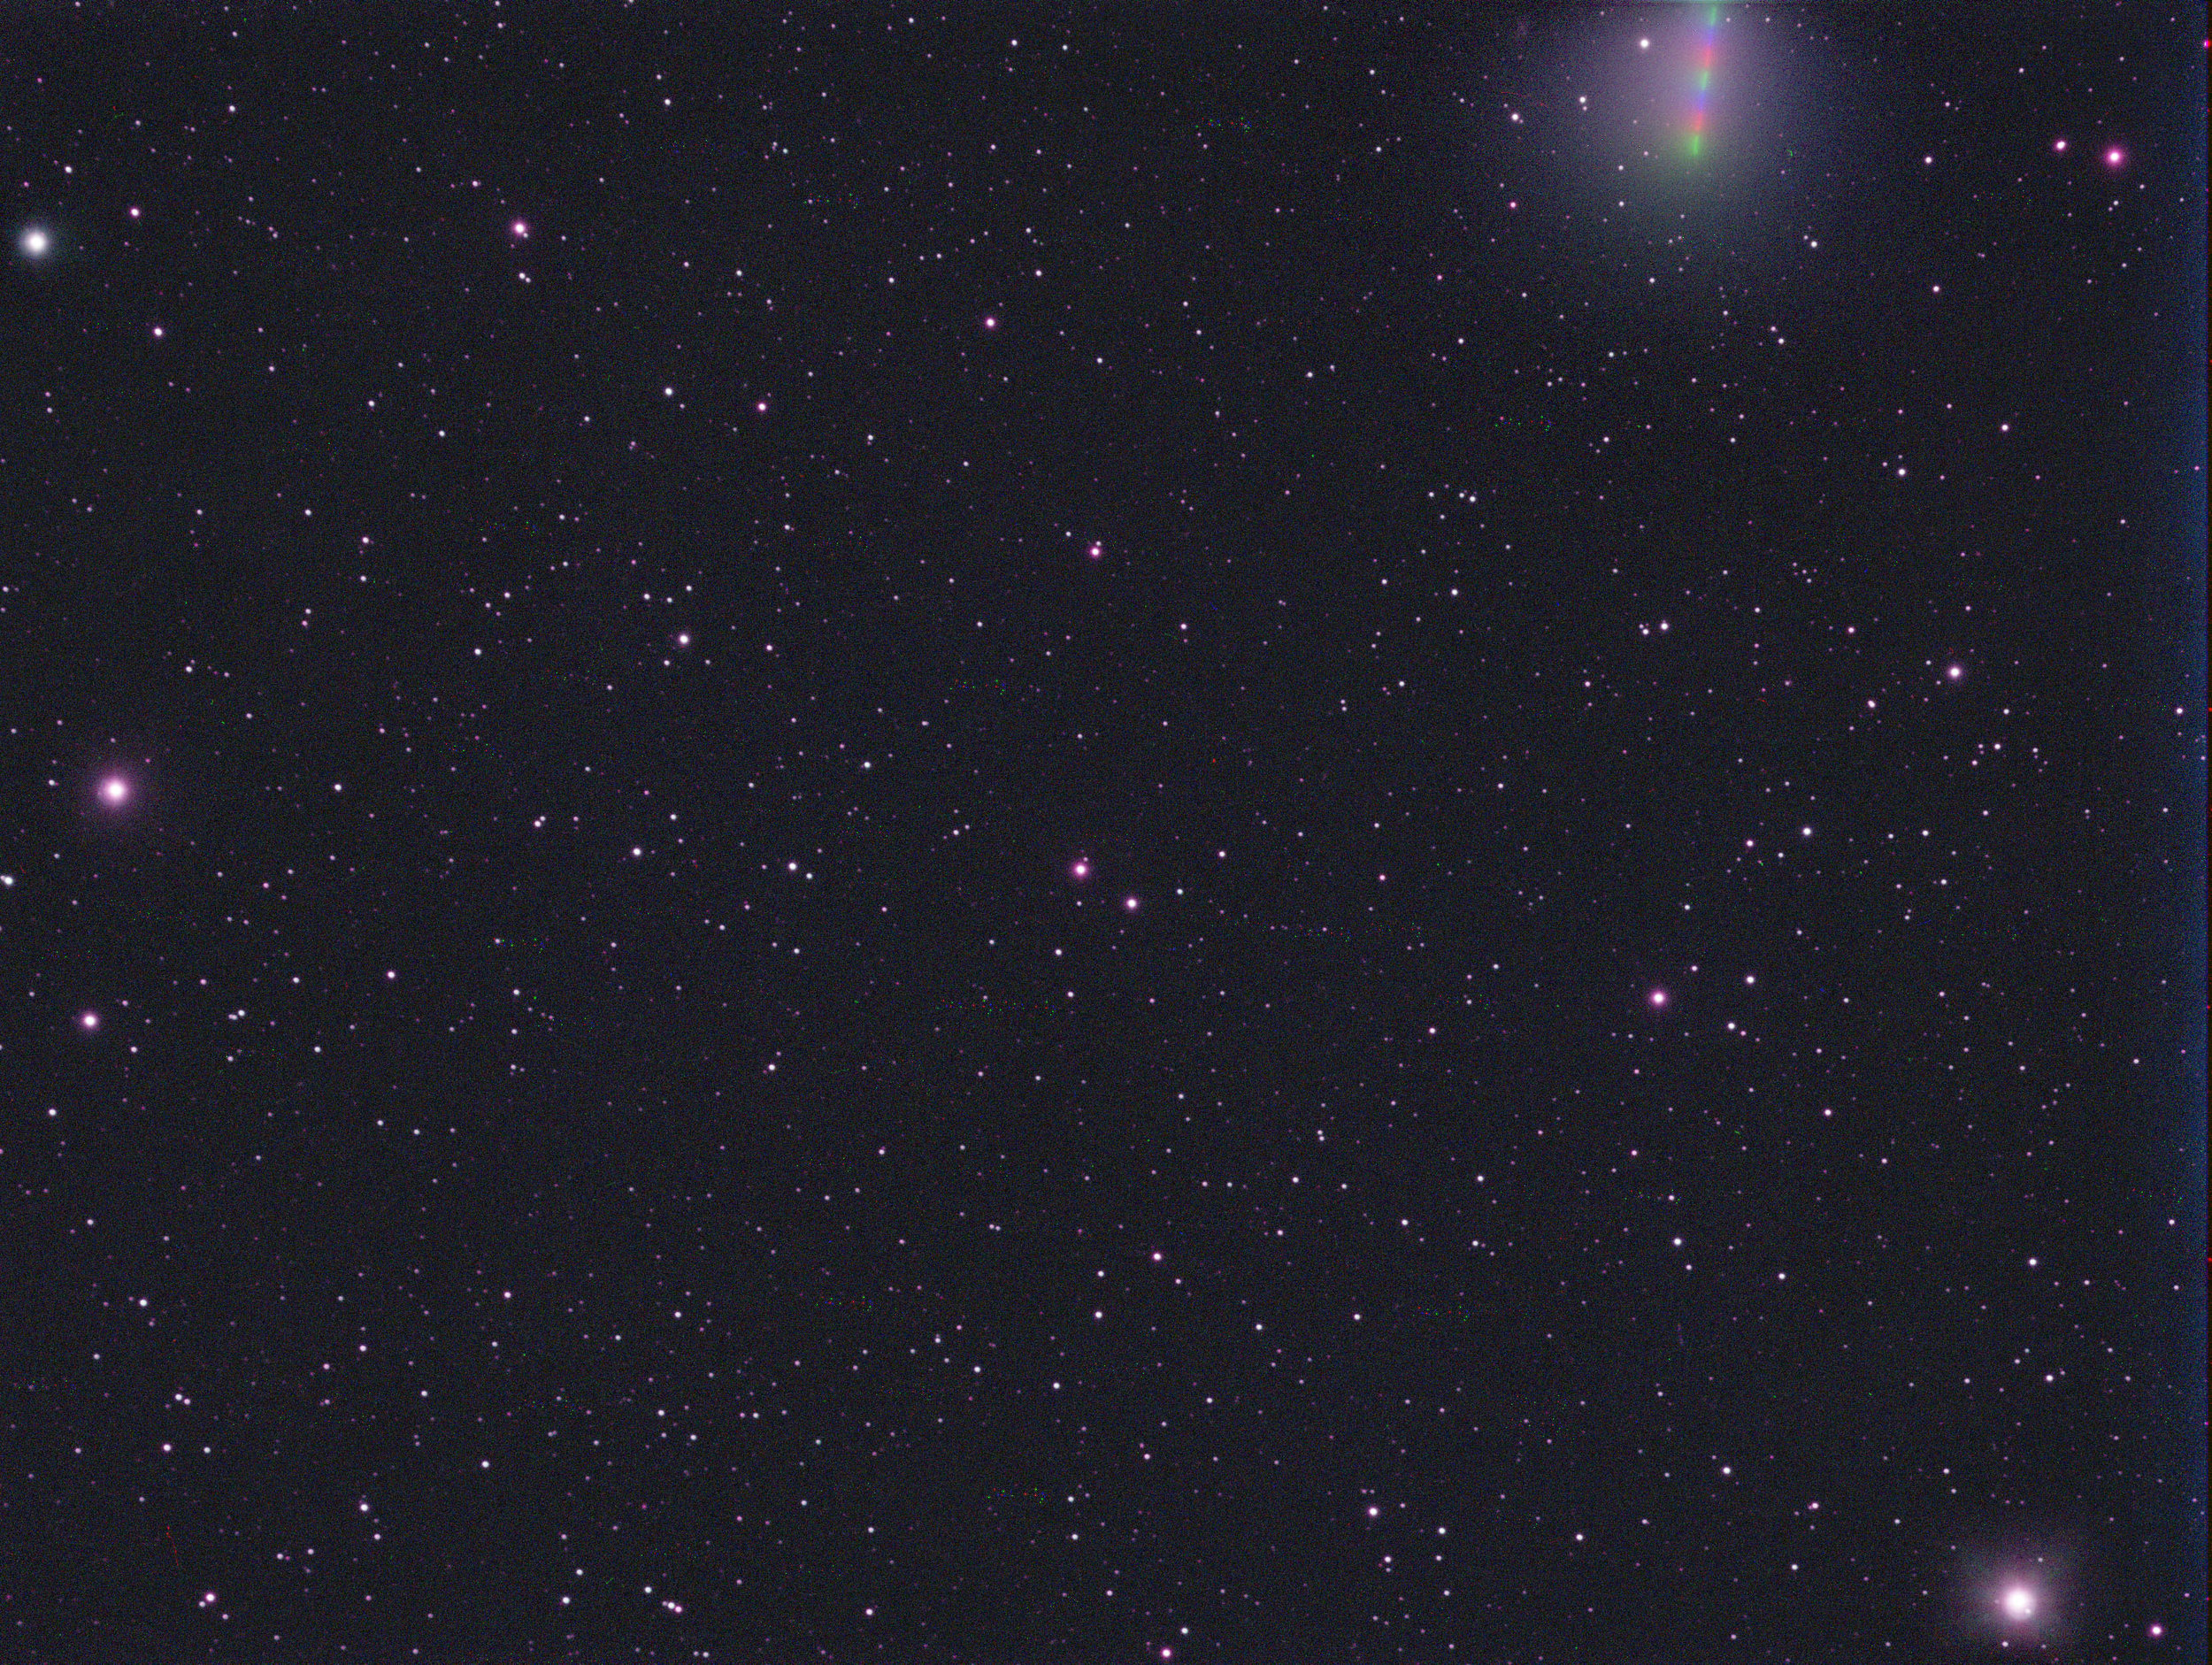
Side by side you will need to stack your star data. You will add your stack the aforementioned way you did with the comet caput. When stacking in Maxim for the stars I recommend using 2 star Alignment since the comet head till throw off Auto Star alignment and may not work with Astrometric. Yous will again open up each sub and select the same ii stars in each sub. You will so select the combine method every bit Sigma Prune or Average. I recommend Sigma prune as it can assist stack out artifacts in the image. If you lot stacked the star data correctly you lot should have round stars and a comet that trails in the image as seen beneath. Depending on Where the comet is in your image or if you recenter the comet when you do the stars the trail may be in dissimilar locations.
Afterward y'all stack and procedure the image of the stars you need to get rid of the comet trail. The easiest way to practice this is to employ the spot healing tool in Photoshop. To use this select an area far away from the comet trail holding the Alt button and click on the prototype. And then go over the comet trail, click agree and castor over the trail until its gone. You may want to increase the size of your brush to about 180-200 to make it faster. Once you have done that you lot should have an image of just stars as seen beneath.


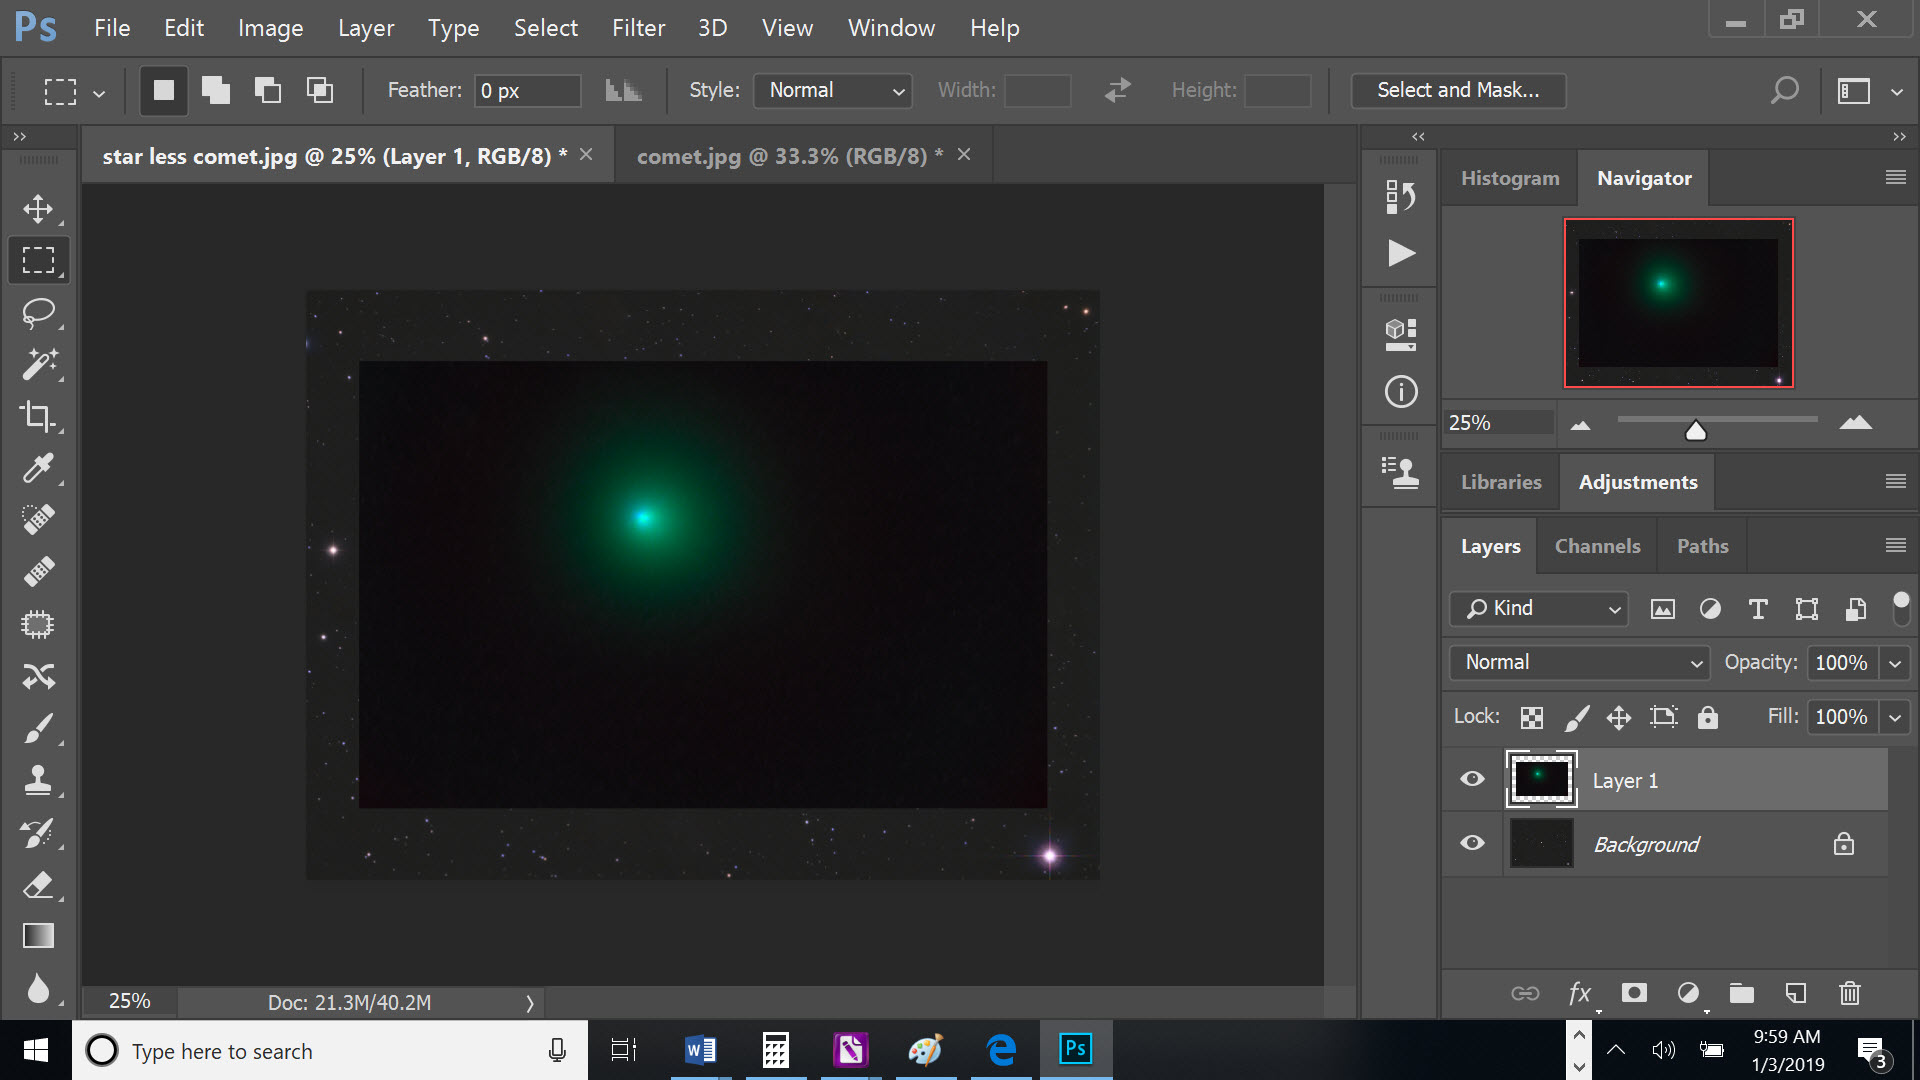
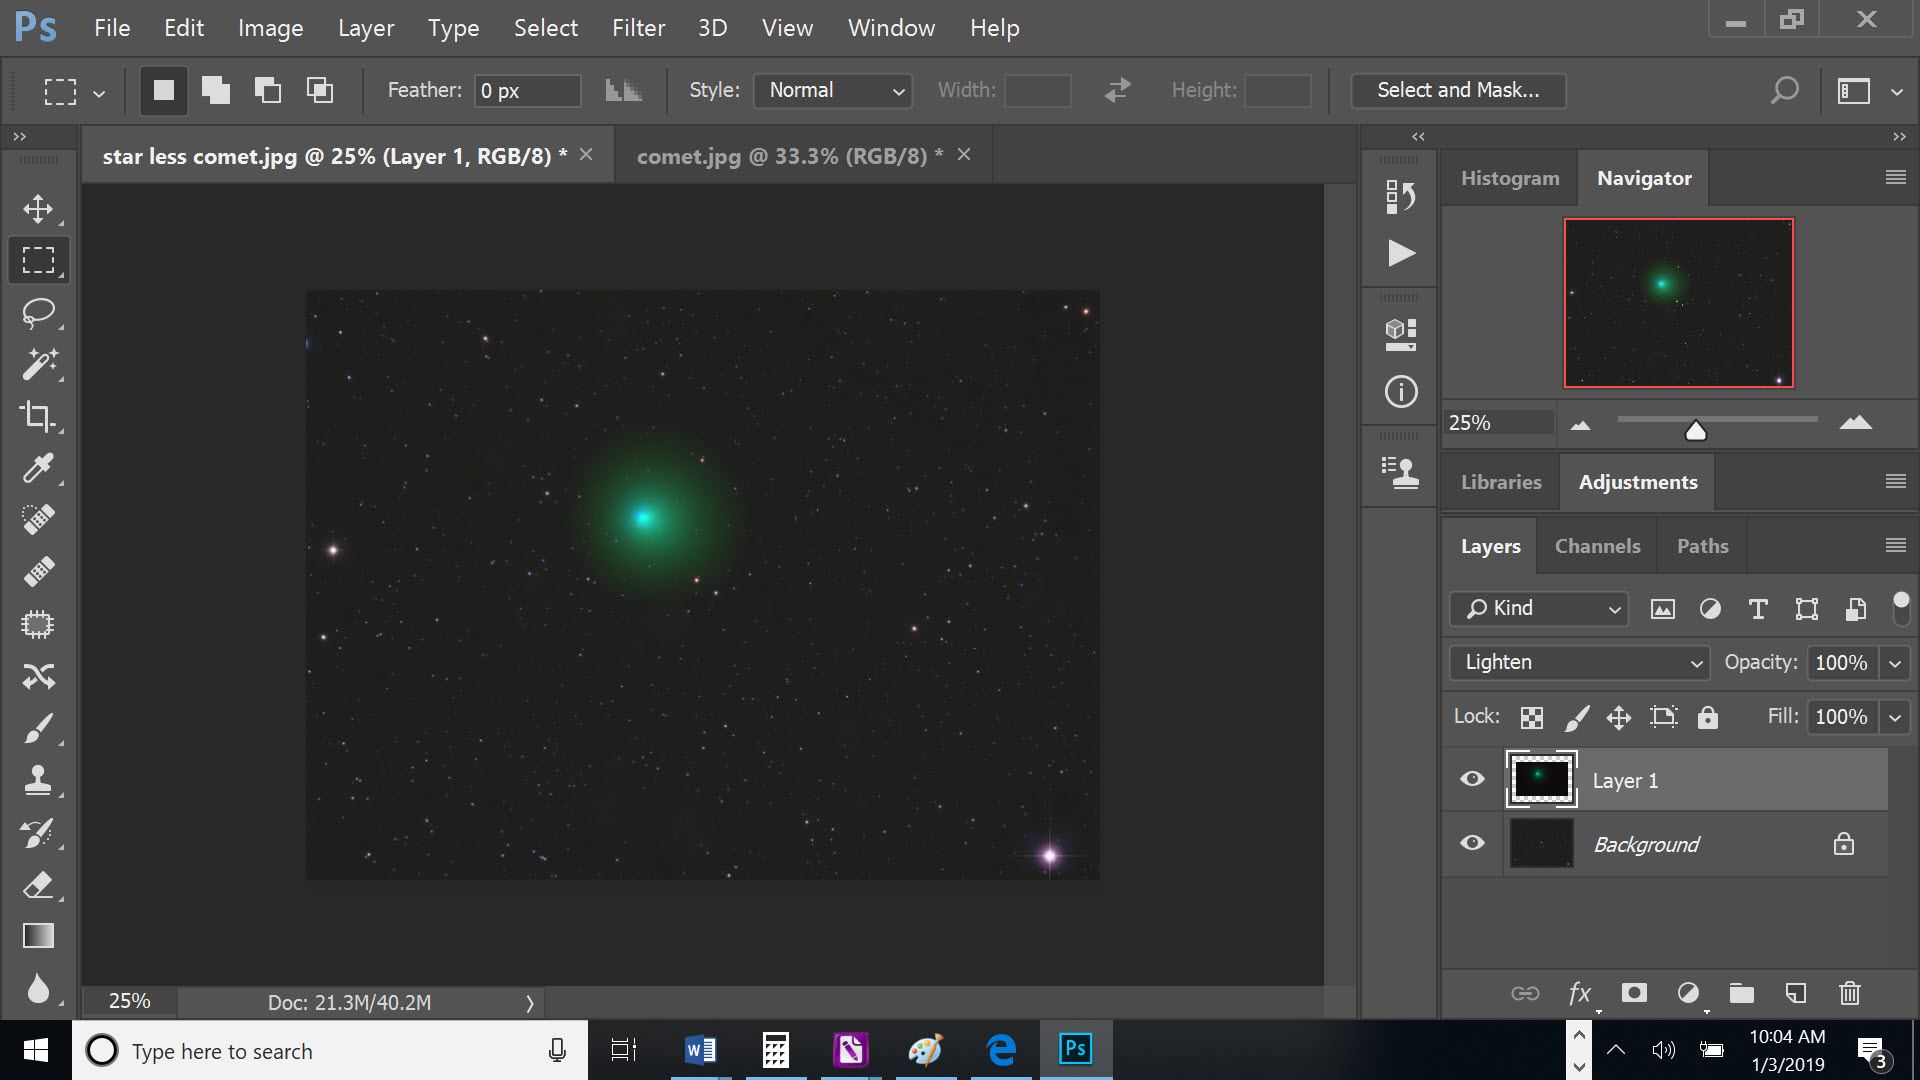
Now that you take the comet head and the star epitome we need to overlay the comet head on the star image. You will need to open both images, Stars and Comet caput, in Photoshop. Yous will want to select all on the comet image, re-create the image and so paste it on the star but image. You should encounter something like the image beneath once your done.
At present that you take the comet on top of the stars its time to blend the layers. In gild to blend the layers you get over to the layers window on the right of the screen and change the drop downwardly box next to Opacity from Normal to Lighten.
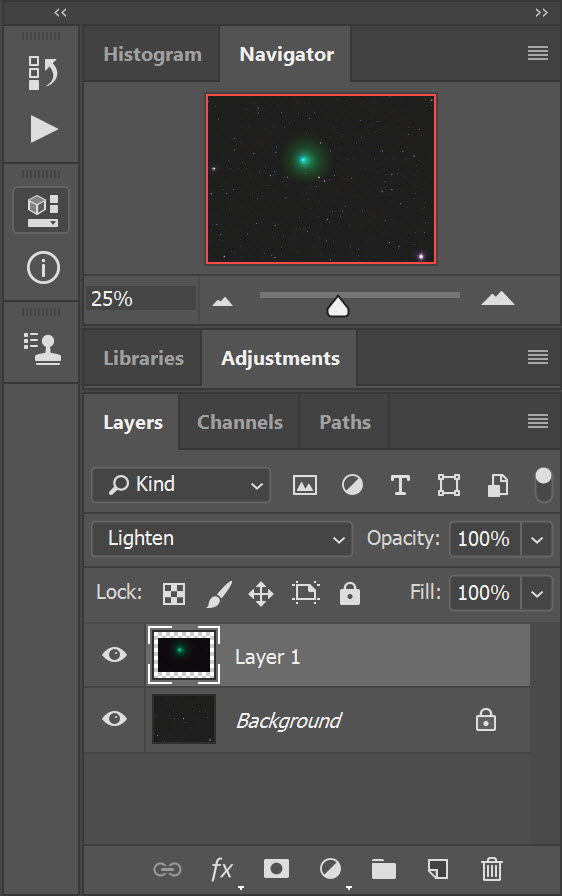
Once you select lighten you lot should have a blended comet prototype every bit seen below. Here y'all can do your final processing to complete your image. You tin also adjust the opacity and the fill if you desire to reduce or expose the comet head bloom.
PIXINSIGHT COMET PROCESSING
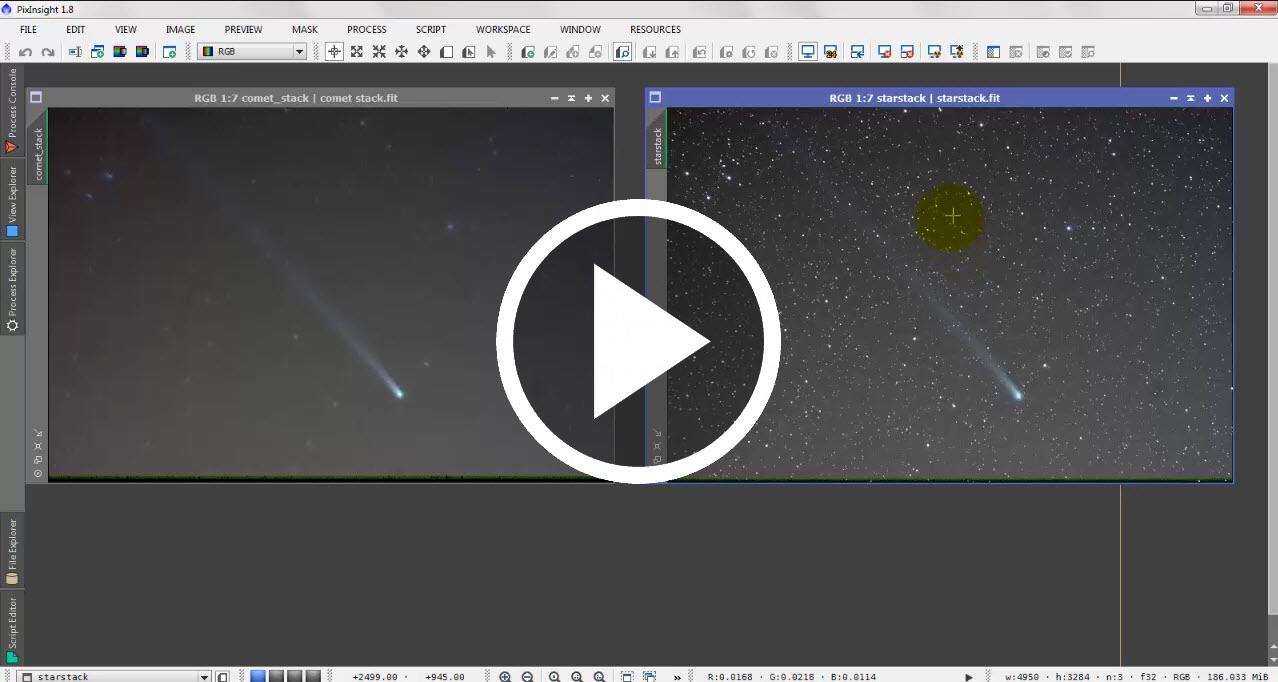
Here is a video tutorial done by Harry'southward Astro Shed. Its a complete tutorial for comet processing in Pixinsight. The tutorial is completed with Ane Shot Color data. If you take a mono camera just do star alignment, epitome integration per aqueduct and and so LRGB combine to get your "star stack" file, as seen in the tutorial. You may need to run Dynamic Groundwork Extraction on your combined epitome. (Run across other notes below)
I too plant when doing star alignment on my LRGB Channels I was getting failures with the default settings. You may need to increase Detection Scales in the Star Detection tab or increase some of the settings in the Star Matching Tab.
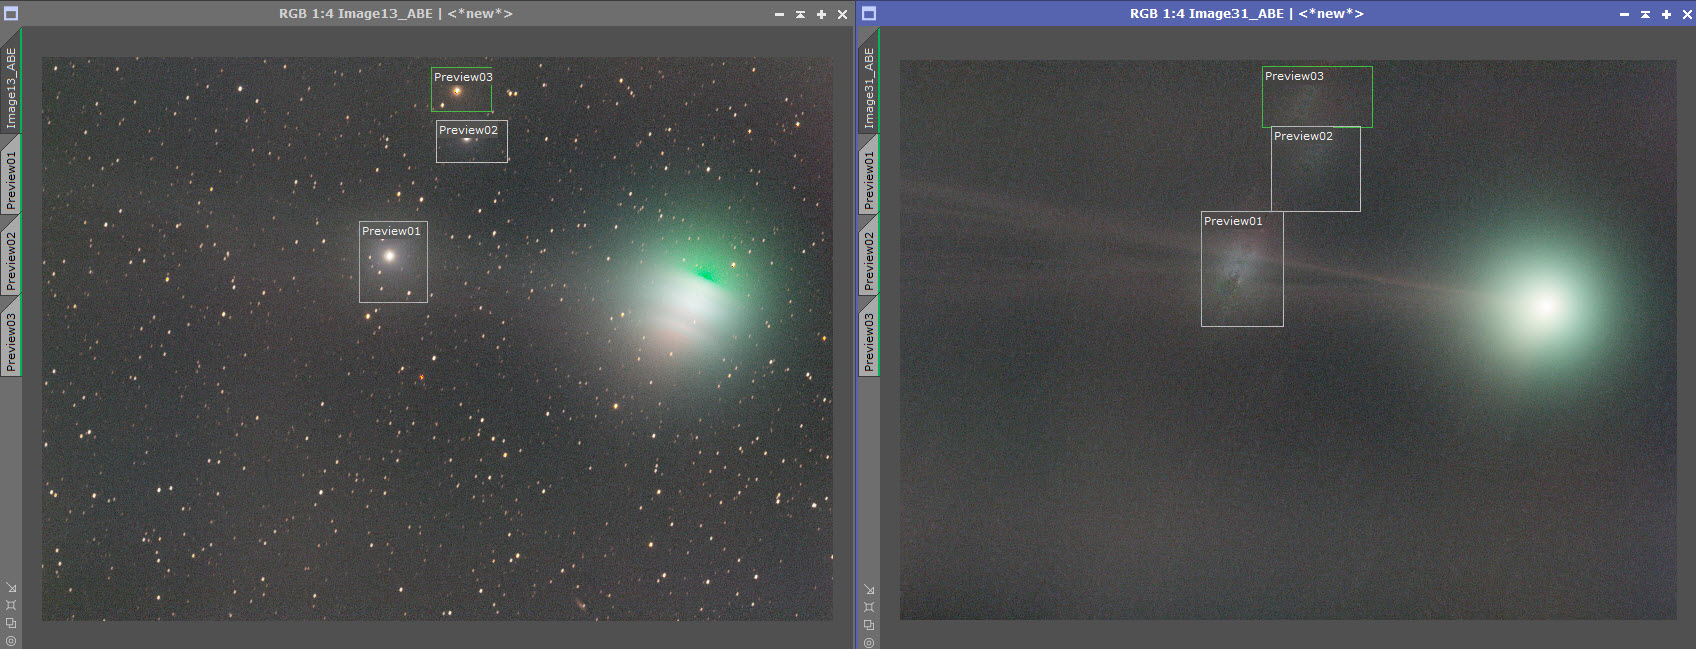
My last suggestion is if y'all notice you have bright stars in your "Star Stack" prototype you may want to duplicate your registered information and clone out the bright stars prior to the comet alignment. Its potentially a lot of actress work but bright stars don't stack out well and cause a blurred trail after Comet Alignment. Doing this volition save yous on post processing clean up. Below is an instance and the preview boxes will show yous which stars acquired the streaks in the comet aligned image.
If yous find the integration procedure in Pixinsight not satisfactory or working properly you can always take your Star Stacked image and Comet Aligned image into Photoshop and follow the to a higher place Photoshop tutorial for Maxim and Photoshop.

How To Do Comet Mode In Photoshop,
Source: https://www.theastrogazer.com/home/2018/12/12/comet-processing
Posted by: jacksonpaphatterst.blogspot.com
0 Response to "How To Do Comet Mode In Photoshop"
Post a Comment