

How To Add White Space In Photoshop

Derived from the Japanese give-and-take 'boke,' significant 'mistiness,' bokeh is a photography jargon commonly known to the world as a photography event. Many photographers use this technique to create a soft out-of-focus blur in their photographs. Information technology enhances the visual appeal of any image by making it announced dreamy and aesthetically pleasing. Oftentimes accomplished by using fast prime lenses while photographing, information technology can besides be created during the post-processing stage. Moreover, many photographers find that adding bokeh using Photoshop gives the most realistic upshot. So, here's an amazing tutorial that will have you through the pace-past-step process of learning how to create the bokeh effect in Photoshop for whatsoever image.
How To Add Bokeh Effect In Photoshop
- Footstep one: Separate the Subject from the Background
- Step 2: Fill the Subject area with Content-Aware fill up
- Step iii: Blur the Groundwork using the Maximum filter
- Footstep 4: Create Field Mistiness
- Step 5: Suit the Underlying Layer with the Blend If department
Detailed Steps For Adding Bokeh Outcome In Photoshop
Stride ane: Split up the Bailiwick From the Background

- Press CTRL + J (Command + J for Mac) twice to create 2 layers with copies of your image and then that there's one layer for the discipline and i d layer for the groundwork
- Select the Subject layer, choose whatever of the choice tools, and and then click on the Select and Mask option at the top to complete the selection. Annotation that the Select And Mask feature is but available in Photoshop version 2015.five and above
- Change the View to On White and adapt the Opacity using the given slider past bringing information technology to the middle
- Use the Quick Select tool to paint over the Subject
- For painting over the pilus area of the Subject, apply the Refine Edge Brush Tool and paint over the messy areas
- So, scroll down and cull Output To to Layer Mask and press OK
- You will run across that a white layer mask thumbnail will appear.
Footstep 2: Make full the Field of study With Content-Aware Fill
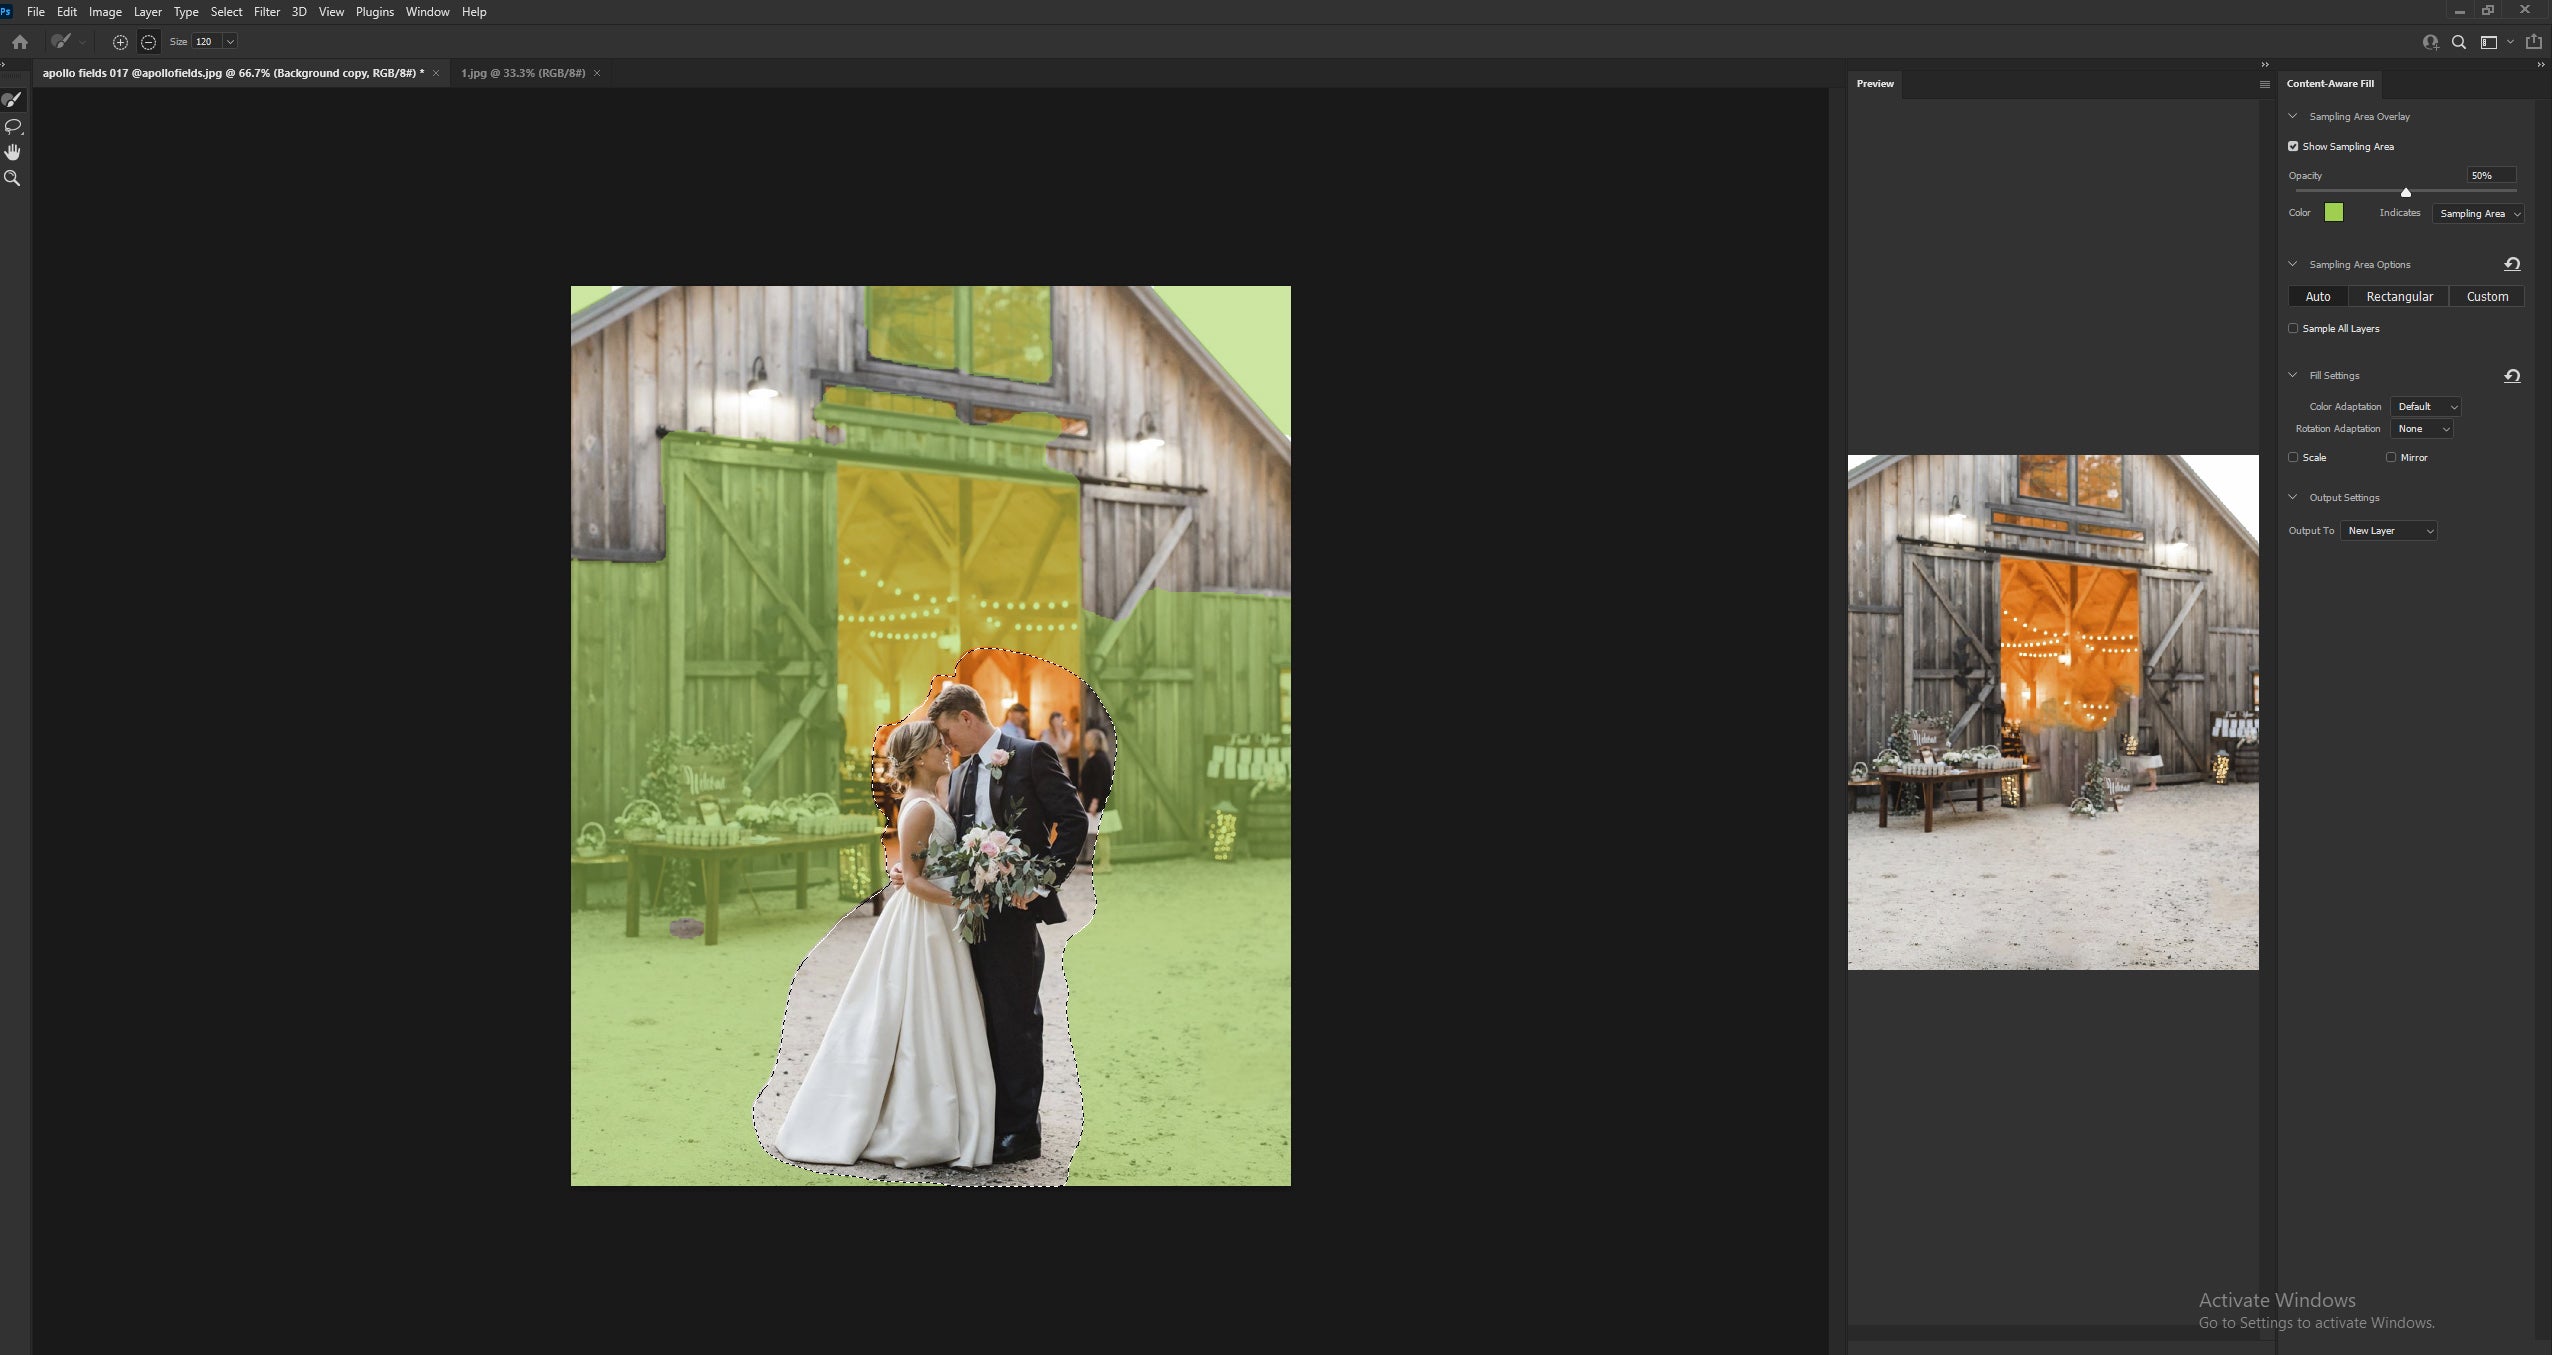
- Select the Background layer and using the Lasso Tool select the surface area around the subject field while leaving some space.
- At present, select the entire subject and cutting it out using Content-Enlightened Fill.
- To utilise this, get to Edit and select Make full, then change Contents to Content-Aware and printing OK (Edit > Fill > Content-Aware).
- Subsequently you are done with information technology, press CTRL + D (Command + D for Mac) to deselect the current layer, and you will run across that area is at present roughly filled.
Step 3: Blur the Background Using the Maximum Filter

The Maximum filter in Photoshop helps in adding beautiful bokeh effects by expanding on the highlights. This filter adds an effect of dilation, thus, spreading out the white.
- First, convert the background into a smart object and then that you can change the values of the filter later. To do this, go to Filters, and then click on Convert For Smart Filters, and press OK
- Now, go to Filter, select Other, and then click on Maximum
- Go to Preserve, and there will be two shape options – Squareness and Roundness. Select whatever bokeh shape you desire in your epitome
- Then, check the Preview box. This will assistance yous monitor real-time changes in your image. And then using the slider, adjust the radius appropriately, and press OK
- You volition see that with the use of the Maximum filter, information technology has expanded on every highlighted area, whether or not it's a light source
- At present, to go a more than natural bokeh effect, erase the effect from some areas that appear unnatural and paint over areas where you want to bring back the bokeh effect
- To achieve this, click on the Mask button, use the soft castor, and gear up black equally the foreground colour. So, kickoff erasing areas from where you want to remove the issue
- Later on achieving the desired issue, if you wish to bring back the upshot in some places, press X and change the foreground color to white, and paint with white in those areas.
Step 4: Create Field Mistiness
- First, select the Groundwork Layer, then go to Filter at the top, click on Blur Gallery, and choose Field Blur (Filter > Mistiness Gallery > Field Blur). Then, click on the Blur tool to adjust the mistiness using the slider and press OK one time you are done. For those who are using a Photoshop version older than Photoshop CS6, use Blur > Lens Blur. This will get you a like effect
- To enhance it, come down to Furnishings and conform the Light Bokeh, Bokeh Color, & Light Range to get the desired effect and printing OK. Alter the Blend Mode from Normal to Screen or Overlay
- Become to Image, and so Adjustments, and select Levels, and adjust how intense the bokeh is through the slider. Then, press OK
- At present, if yous wish to do colour grading, select the Bailiwick layer (the topmost layer), click on the Adjustment Layer icon, and then choose Curves to piece of work on
- Click on the Adjustment Layer here and select Color Lookup and select the desired effect. Some of them include LateSunset, CrispWarm, and DropBlues.
Footstep five: Adjust the Underlying Layer With the Blend If Section

To remove the effect from the shadows, follow the given steps:
- Double click on the right-paw side of the layer and then use the Blend If section to adjust the underlying layer through the slider
- The left side of the slider represents darker areas, and the right side of the slider represents brighter areas
- Hold the ALT key to intermission apart the slider into two, and after adjusting, press OK.
Further Read: How To Add together White Groundwork In Photoshop
The procedure of mastering any tool begins with using it for the first time. At present that you know how to add the bokeh effect in Photoshop, we hope yous will also explore other Photoshop features. Experience free to share your questions and experience in the comments department below!
At ShootDotEdit, nosotros love bringing you resourceful tips that assistance you stand out as a hymeneals photographer. Only, if editing is taking besides much of your fourth dimension, make it effortless past letting us take care of information technology. Check out our price plans to learn how we can assist.
Note: These steps are updated for the latest version of Adobe Photoshop.
Back to News
Source: https://shootdotedit.com/blogs/news/bokeh-effect-in-photoshop
Posted by: jacksonpaphatterst.blogspot.com
0 Response to "How To Add White Space In Photoshop"
Post a Comment